Building a Flask Reverse Proxy Server: Simplifying Web Orchestration
Welcome to our series focusing on the creation of a cloud management server orchestration unit. We’re starting with a straightforward yet impactful project: crafting a reverse proxy server using Flask. As we dive into this endeavor, we’ll not only guide you through the process but also revisit essential terms to ensure a clear understanding of the concept.
Container Orchestration: Exploring the Basics
Before we delve into the nitty-gritty, let’s clarify the term “Container Orchestration.” In simple terms, it involves managing containers—ensuring their health, usage, and more in your application. While it encompasses various features, we’ll highlight three key aspects:Load Balancing: Efficient orchestration demands load balancing, equally distributing API calls among backend servers (containers). Algorithms like Round Robin and Least Connections ensure seamless distribution and enhanced performance.
- Fault Tolerance: In a cloud setup, fault-tolerant systems are paramount. The master continuously monitors servers or containers, ensuring they’re operational. Our Flask server will monitor each container via a health check API to ensure smooth operation.
- Auto Scaling: Auto scaling dynamically adjusts resources based on demand. Rules dictate how resources are scaled up or down, enhancing cost efficiency and performance.
The Role of Reverse Proxy: Balancing, Protecting, and Directing
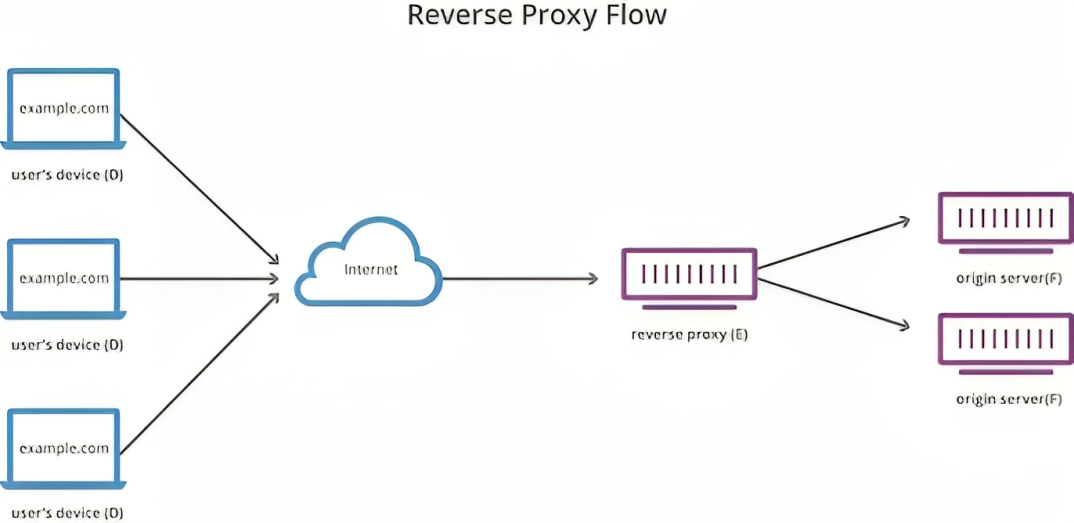
A reverse proxy server plays a pivotal role in efficiently managing the aforementioned orchestration aspects. It stands on the server side, juggling load balancing, fault tolerance, and routing requests. Unlike a forward proxy that communicates with servers as a middleman, a reverse proxy handles clients’ requests and redirects them to multiple servers.
Simplifying the Process with Flask: Your Reverse Proxy Server
To demonstrate this concept, let’s create a simple app server using Flask, a micro web framework in Python. This forms the foundation for our reverse proxy server, paving the way to route requests to your application server.Setting Up and Starting with FlaskStart by installing necessary packages and creating a virtual environment:
sudo apt-get install -y python python-pip python-virtualenv
sudo virtualenv env
source env/bin/activate
sudo pip install Flask==0.10.1
Creating a Basic Flask AppIn a directory named “flaskproject,” create a file named “app.py” and add the following code:
from flask import Flaskapp = Flask(__name__)@app.route('/')def index():return 'Flask is running!'if __name__ == '__main__':app.run()
This simple app runs the Flask server at the default port 5000. Accessing “localhost:5000/” should display “Flask is running!”Building the Reverse Proxy LogicTo create a reverse proxy, you’ll redirect requests to desired servers using Flask’s request and Response formats. We’ll use the Python requests library to interact with application servers.For example, the function to redirect a GET request looks like:
@app.route('/<path:path>', methods=['GET'])def proxy(path):if request.method == 'GET':resp = requests.get(f'{SITE_NAME}{path}')excluded_headers = ['content-encoding', 'content-length', 'transfer-encoding', 'connection']headers = [(name, value) for (name, value) in resp.raw.headers.items() if name.lower() not in excluded_headers]response = Response(resp.content, resp.status_code, headers)return response
Generalizing for Different HTTP MethodsFor other HTTP methods like POST and DELETE, similar functions can be crafted. Combining these, you build a functional proxy server that redirects requests as needed.
In Conclusion
Creating a Flask reverse proxy server lays the foundation for orchestrating web requests efficiently. This simplified implementation showcases the power of Flask in managing server interactions seamlessly. As you advance, you can explore more complex scenarios and enhance your proxy’s capabilities. Stay tuned for more insights on web orchestration and server management!


Leave A Comment